Herb's 8-inch mirror
this Web page last updated in 2007, links refreshed 2017.
Acknowledgements: Thanks to ATM'er Dave Sopchak for his help years ago to get my mirror going. [In 2017 he has a PhD from Case Western and is CTO of a fuel-cell company.] Thanks to Gordon Waite for sharing his knowledge and facilities, and the many people of the STAR Astronomy ATM group for their support and advice. Many quotes below are from Gordon, from the
STAR ATM discussion board, or both.
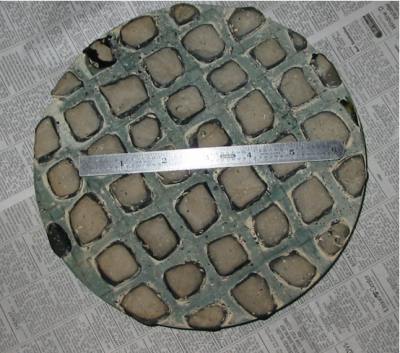
![[8-inch mirror]](lmymirror.jpg) History: Sometime in the late 1990's, I bought an unfinished Pyrex 8-inch mirror and its glass tool at NEAF. A few years later, Dave Sopchak offered his help and time to a stranger (me). I did a final polish and figure, producing what Dave called at the time "about a 1/3 wave" surface. Here's what the old polishing tool looked like (some years later.:(..) with its previous pitch lap, left
uncovered and essentially all dried out. Bleah!
History: Sometime in the late 1990's, I bought an unfinished Pyrex 8-inch mirror and its glass tool at NEAF. A few years later, Dave Sopchak offered his help and time to a stranger (me). I did a final polish and figure, producing what Dave called at the time "about a 1/3 wave" surface. Here's what the old polishing tool looked like (some years later.:(..) with its previous pitch lap, left
uncovered and essentially all dried out. Bleah!
In 2003, NJAA member Dave Nelson wrote articles in the NJAA Astronotes about
his mirror-making work with an ATM group associated with the STAR astronomy club in
southeast New Jersey. He peaqued my interest in mirror grinding, and in my old mirror. From years 2003-2005, I worked on it and completed it to better figure and to aluminizing, thanks to Gordon Waite and the STAR ATM group who meets with him. Then I built a simple wooden cell for the mirror, and mounted it in a Sonotube with the usual spider secondary and 1.25 inch focuser. Finally, in summer 2006, I attached the OTA to a Meade equitorial mount and got first light. This page is the story of that last few years of working the glass.
For my other astronomy work, follow this link. My home page
for my day work in computers is also in my Herb's stuff Web section.
Herb Johnson
In November 2003 I asked Dave Nelson to take it to his STAR mirror-
making group for testing. They said it was about 1/3.5 wave,
a 56.7" focal length and that it had a "checkboard bumps"
surface, probably etched from sitting on the tool's old pitch lap and
abrasives. They suggested I come by to make a pitch
lap and to repolish the mirror. So, for a few Mondays in early December 2003
I visited the STAR astronomy club
mirror-making ATM group at Tinton Falls NJ, at
the facilities of Gordon Waite. With their assistance and generousity
I completed a pitch lap and got in about 1.5 hours of actual
polishing. Then I packed the tool and mirror, seperated by a plastic
screen, in a bag (and later in a pastic container).
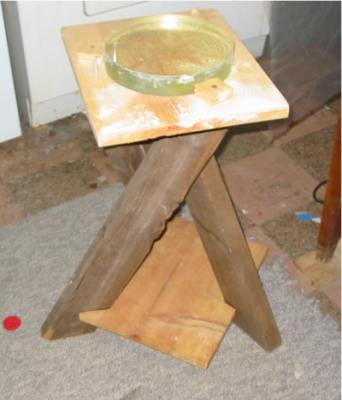
Just before Christmas 2003, I set up
a simple polishing stand at my
home. I removed the screen from the tool,
cleaned tool and mirror, and gave the mirror another 1/2 hour of
polish. Then I set up a simple
Foucault tester, consisting of a blue LED flashlight and a razor blade.
I made a pinpoint light source with a pinprick in a piece of aluminum
foil; and I taped the razor blade to a block of aluminum. By careful
movement of the blade's edge into the focal point of the mirror, I
created a Foucaultgram of the surface, which with some effort I
photographed with my digital camera. Considering the setup and
my hand-held camera, the results gave me a clue about Foucault testing
and my mirror.
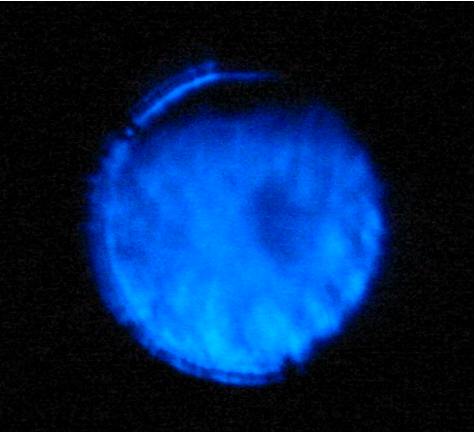
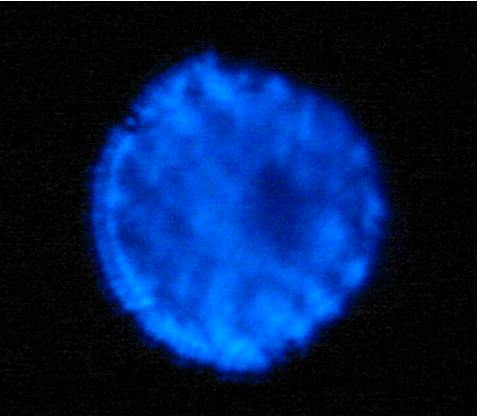
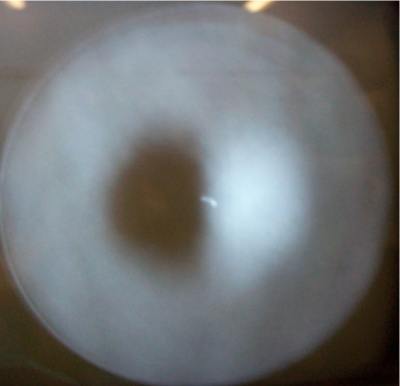
![[Dec 2003 mirror]](lfocault1.jpg) My crude images of the Dec 2003 Foucaultgram are image1,
image4, and image5.
The mirror itself is photographed as well. The
Foucaultgrams and mirror are oriented the same. Note the "hill" at
the center of the images, typical for a parabolized spherical surface. Also note
however the "legs" off that hill at about
6 o'clock and 4:30. I hope those "legs" are just a bit of crud
left on the mirror rather than a surface feature!
My crude images of the Dec 2003 Foucaultgram are image1,
image4, and image5.
The mirror itself is photographed as well. The
Foucaultgrams and mirror are oriented the same. Note the "hill" at
the center of the images, typical for a parabolized spherical surface. Also note
however the "legs" off that hill at about
6 o'clock and 4:30. I hope those "legs" are just a bit of crud
left on the mirror rather than a surface feature!
2004 work
In spring 2004 I returned to Gordon Waite and the STAR ATM group, for
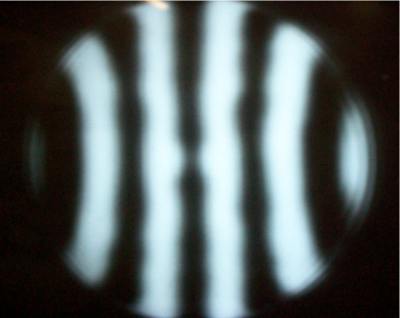
more measurements on their Foucault tester and some advice. For reference, the Foucaultgrams and Ronchigrams below are all illuminated with a blue LED, wavelength about 460-470nm.
My previous pitch lap was damaged, so Gordon said to remake the
pitch lap and suggested strokes for another round of polishing. In Oct 2004 I got
the Gogoltz 64 pitch from GotGrit.com. I poured that
pitch lap at an October 2004 ATM meeting and began another round of testing and polishing
through the year.
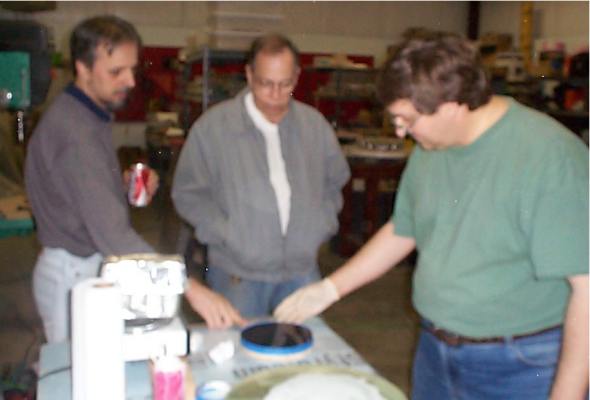
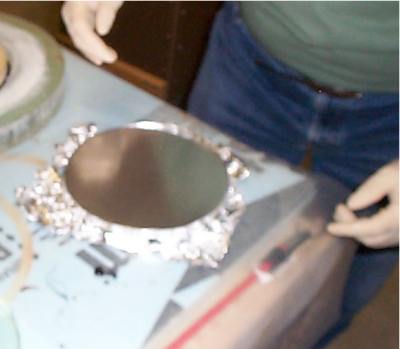
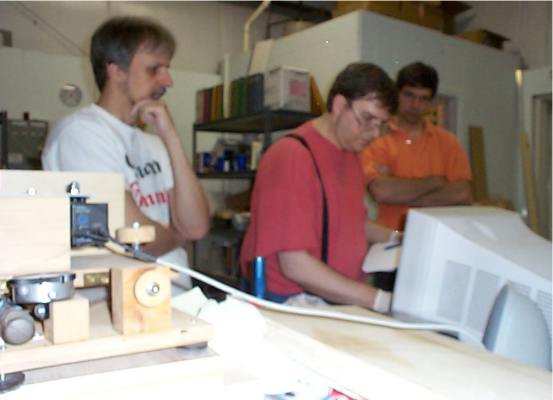
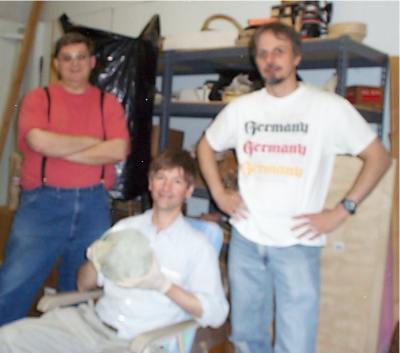
From Oct 2004, here's Gordon Waite (right) inspecting the fresh pitch lap
he just poured.
Here's the lap covered in Al foil before its first press on the mirror.
Not shown is the cutting of the lap facets with a hot iron. The resulting lap
is photographed below some time later.
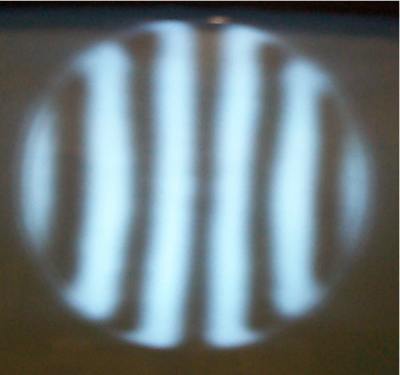
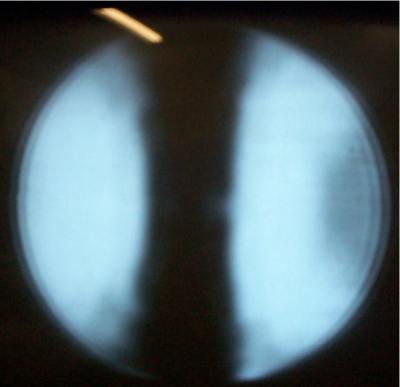
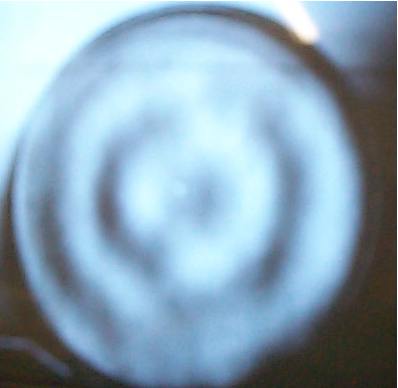
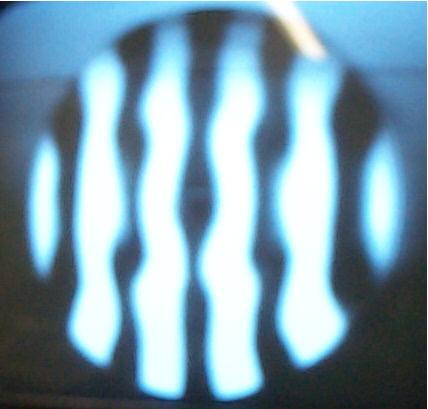
![[oct 04 mirror]](lmf_oct04.jpg) At the end of Oct 2004, the mirror still needs some good polishing;
the Foucaultgram show concentric ruts, the Roche gram
shows the very turned-down edge (the bars hook at either end) and the shallow center (the bars are thin in the middle). But the good news is that the mirror appears mostly "flat" in overall curve on the Foucault test: that is, it's not far from a sphere.
At the end of Oct 2004, the mirror still needs some good polishing;
the Foucaultgram show concentric ruts, the Roche gram
shows the very turned-down edge (the bars hook at either end) and the shallow center (the bars are thin in the middle). But the good news is that the mirror appears mostly "flat" in overall curve on the Foucault test: that is, it's not far from a sphere.
Jan 2005 work
During the winter of 2004, I continued to work on the 8-inch mirror.
At the start of my January 3rd session at 10PM, my goal was to was to bring the overall curve of the mirror out beyond the relatively "flat" edge of the outer 1/3rd. By measurement the difference between the inner and outer zones was .115, a little "high" compared to the .060 correction desired. The "prescription" was a long W-stroke of five, 6 or 7 inches long, with the mirror on top. But after a few rounds, the result was a DEEPER center creating a difference of .150. The new prescription then was to polish with the TOOL on top, a one-inch off-center stroke of 3" length, minimal pressure, five minutes.
But the consequence of that round was to go DEEPER, to .155!?! And another round of ten minutes made it deeper STILL, to .160! Gordon was purplexed, this was backward. We carefully went over what I was doing: sure enough, I was backwards in a sense: I had the MIRROR on top, not the tool!
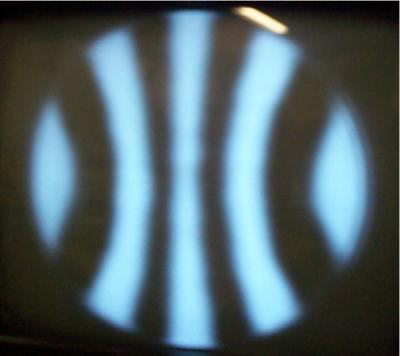
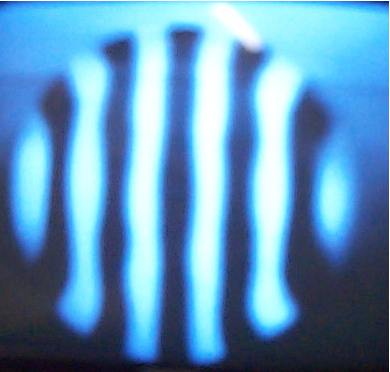
![[jan 05 mirror]](lfoc_105.jpg) So at the end of the January 3rd session at 1AM, the results are as per the image on the left of my Foucaultgram. You can see the outer zone is curving down too sharply, while the inner zone is also a little deep. The Ronchi test image shows the overall curve is better than the previous session: there is a too-deep inner zone, and the formerly flat outer zone is becoming curved. The goal is a parabolic curved to the "figure", which will appear as something like a doughnut in the Foucaultgrams, and smoothly-bent bars in the Ronchigrams. Details of how to measure this "goal" numerically are below. But now I can start paying attention to the figuring of the mirror!
So at the end of the January 3rd session at 1AM, the results are as per the image on the left of my Foucaultgram. You can see the outer zone is curving down too sharply, while the inner zone is also a little deep. The Ronchi test image shows the overall curve is better than the previous session: there is a too-deep inner zone, and the formerly flat outer zone is becoming curved. The goal is a parabolic curved to the "figure", which will appear as something like a doughnut in the Foucaultgrams, and smoothly-bent bars in the Ronchigrams. Details of how to measure this "goal" numerically are below. But now I can start paying attention to the figuring of the mirror!
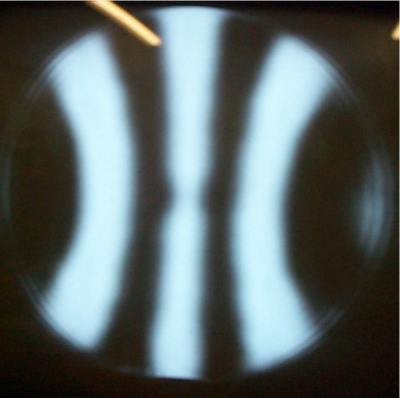
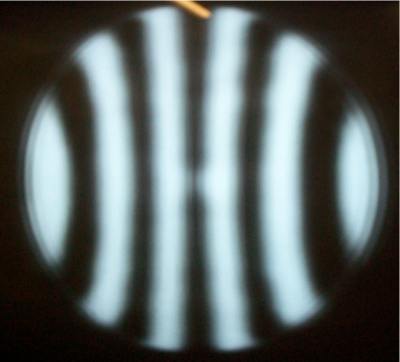
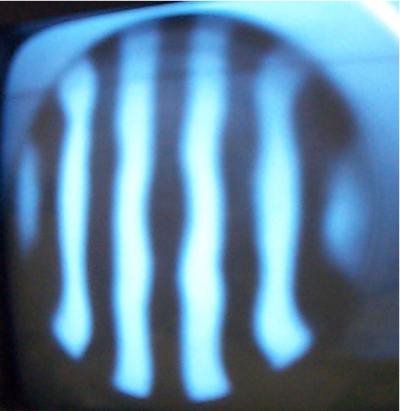
![[early jan 17 mirror]](lfocau1.jpg) Starting the session of Jan 17th 2005 at 8PM, I did two sets of "press and polish" followed by testing. The prescription was a 1/3 center-center stroke but going ONE INCH to the left and right to reduce the curve. The result produced the Foucaultgram to the left which shows some zoning and a center bump. The corresponding Ronchigram highlights the zones and bumps, plus some wriggles due to air currents in the light path of the tester. Gordon
did some mask testing: here's the outer zone mask image for instance. Deviation from inner to outer zone (details of measuring this are below) was .128, below my previous session's .160 but above my "goal" of .060.
Starting the session of Jan 17th 2005 at 8PM, I did two sets of "press and polish" followed by testing. The prescription was a 1/3 center-center stroke but going ONE INCH to the left and right to reduce the curve. The result produced the Foucaultgram to the left which shows some zoning and a center bump. The corresponding Ronchigram highlights the zones and bumps, plus some wriggles due to air currents in the light path of the tester. Gordon
did some mask testing: here's the outer zone mask image for instance. Deviation from inner to outer zone (details of measuring this are below) was .128, below my previous session's .160 but above my "goal" of .060.
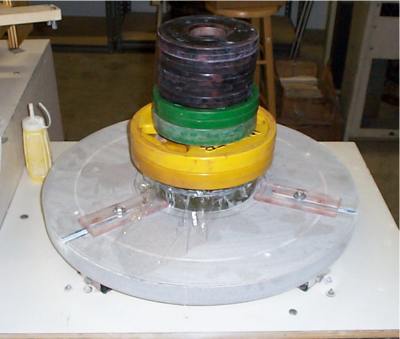
In between polishing runs I pressed the lap. This is a good photo of the wheel I used that night. To the left of the wheel is a condiment bottle of cerium oxide polish. Note the use of plastic-covered weights, to avoid flakes of metal or rust. The tool is on top, and both tool and mirror are covered in plastic wrap, again to avoid contamination.
Gordon then prescribed three sets of center-to-center strokes, tool on top, strokes over the edge by one to no more than two inches. But my technique was poor; I
put pressure on the near edge of the mirror with my thumbs; rather than press evenly over the top and center. Consequently, my second sets of wets produced some zoning; "almost
impossible" to do, said Gordon.
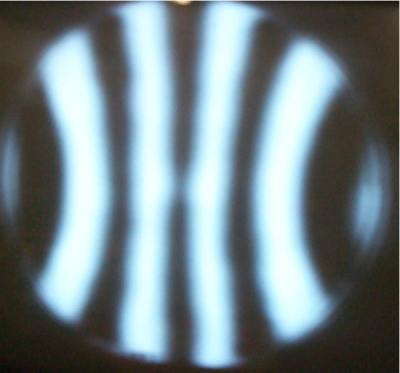
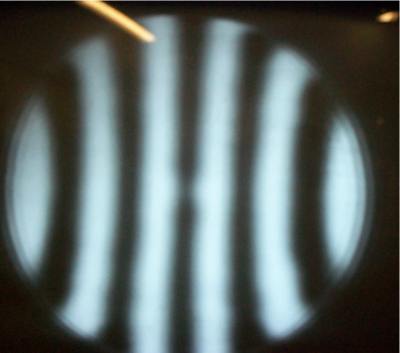
![[late jan 17 mirror]](lfocau2.jpg) Here's the subsequent Foucaultgram at the end of the Jan 17th session, about 11:30PM. Note the bump in the
center - that's from stroking off-center. There are also rings or zoning, at the width of
the pitch lap squares - that's due to nonuniform pressure on the lap. These variations are more visible in a series of Ronchigrams: the first shows the center dip or hill as a nick in
the center bar. The second Ronchigram shows the curving which
is appropriate but note the "wriggles" in the bars either side of center. The
third Ronchi is similar to the second. Zonal masks show the outermost and the innermost zones.
Here's the subsequent Foucaultgram at the end of the Jan 17th session, about 11:30PM. Note the bump in the
center - that's from stroking off-center. There are also rings or zoning, at the width of
the pitch lap squares - that's due to nonuniform pressure on the lap. These variations are more visible in a series of Ronchigrams: the first shows the center dip or hill as a nick in
the center bar. The second Ronchigram shows the curving which
is appropriate but note the "wriggles" in the bars either side of center. The
third Ronchi is similar to the second. Zonal masks show the outermost and the innermost zones.
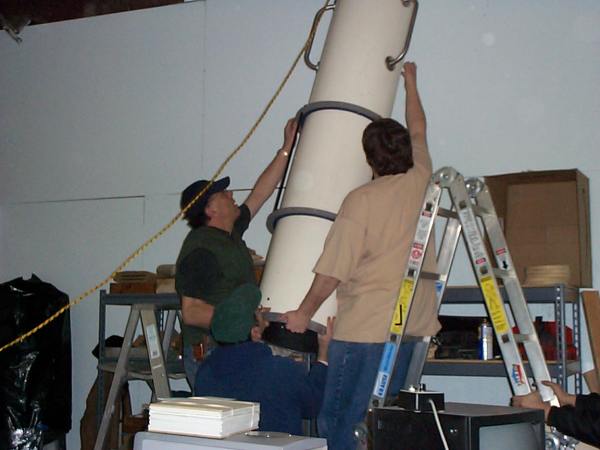
In the course of the evening, Gordon and Art removed an OTA
from the shelf. It's not a toy, that's solid fiberglass and very heavy!
![[jan 31 mirror at 10]](lfocau3_1.jpg) Another session was on Jan 31st 2005. I started at 7:30PM and performed four sets of eight minute "press" and "polish", the same 1/3 center-to-center stroke, tool on top, as last session. A "press" is simply putting weight on the tool over the mirror, as shown here. I paid attention to keeping my fingers on the top of the tool and pushing on the center of the tool, not the edge. Stokes were "slow and steady" across the center, about one complete stroke (back and forth) a second on the turntable. The result by 10PM: the difference between the center and edge deviation from spherical, as measured on the Foucault tester, was 100 mills - closer to the "perfect" parabolic difference of 60 mills, and an improvement from the .137 difference last session. But I still had some light zoning, and a "pimple" in the center, from defects in the pitch lap and the general pattern of pitch rows and columns. The Ronchi shows as much.
Another session was on Jan 31st 2005. I started at 7:30PM and performed four sets of eight minute "press" and "polish", the same 1/3 center-to-center stroke, tool on top, as last session. A "press" is simply putting weight on the tool over the mirror, as shown here. I paid attention to keeping my fingers on the top of the tool and pushing on the center of the tool, not the edge. Stokes were "slow and steady" across the center, about one complete stroke (back and forth) a second on the turntable. The result by 10PM: the difference between the center and edge deviation from spherical, as measured on the Foucault tester, was 100 mills - closer to the "perfect" parabolic difference of 60 mills, and an improvement from the .137 difference last session. But I still had some light zoning, and a "pimple" in the center, from defects in the pitch lap and the general pattern of pitch rows and columns. The Ronchi shows as much.
![[jan 31 mirror at midnite]](lfocau3_2.jpg) The prescription for the next round was to continue the same stroke, but a little longer stroke, for three sets. To reduce the zoning, Gordon recommended a longer, heavier press to start out with. Also, he pointed out for removal specific defects in the pitch squares, where the edges of the squares had bumped out of square. The result of the pitch repairs, heavier press and a few more polish cycles, when measured at 1AM, was a difference of 78 mills.
The prescription for the next round was to continue the same stroke, but a little longer stroke, for three sets. To reduce the zoning, Gordon recommended a longer, heavier press to start out with. Also, he pointed out for removal specific defects in the pitch squares, where the edges of the squares had bumped out of square. The result of the pitch repairs, heavier press and a few more polish cycles, when measured at 1AM, was a difference of 78 mills.
As the mirror was reasonably close to a good figure, Gordon measured the five zonal focal relative distances as shown below.
Check the Foucaultgram on the left, and you can still see zoning and a flatter central bump. But the overall figure is about 1/6th wave. Look at these two Ronchigrams, of several barsand of one bar. The zonal measurements at this point showed the mirror was still a little high in the middle zones.
![[jan 31 mirror at 1AM]](lfocau3_3.jpg) So at 1AM I did one more press and polish cycle, but Gordon recommended that I "microfacet" the pitch lap, by pressing a plastic screen into the lap. While polishing, I found the lap VERY hard to move; I worked slowly and had to muscle the lap along: this was a mistake. The result from this ONE session, as shown on the left Foucaultgram, was increased zoning and no real change in zonal difference - now at 80 mills difference. The Ronchigram shows the zone boundries as wriggles in the bars.
So at 1AM I did one more press and polish cycle, but Gordon recommended that I "microfacet" the pitch lap, by pressing a plastic screen into the lap. While polishing, I found the lap VERY hard to move; I worked slowly and had to muscle the lap along: this was a mistake. The result from this ONE session, as shown on the left Foucaultgram, was increased zoning and no real change in zonal difference - now at 80 mills difference. The Ronchigram shows the zone boundries as wriggles in the bars.
As Gordon diagnosed, the movement of the pitch tool across the mirror with this 1.5 micron CeO polish "should be as smooth as silk". Apparently I did not press the tool long enough as it did not make complete and smooth contact with the mirror. Gordon prescribed a very long and warm press of the lap; followed by 12 minutes of "cooldown"; followed by an eight-minute polish. That would hopefully remove the zones but keep me near the overall figure desired. But at 2AM I realized that fatigue had made me uncautious, and I had an hour's drive home in bitter cold. So I noted the work to be done for next time, and left for the night.
March 2005 and The Secrets of Polishing
The next ATM session I attended was March 7th. As prescribed I did a "warm press" by soaking the pitch tool in warm water (not hot) for two minutes, followed by a press for six minutes with about 50 lbs of weights. But Gordon advised not to start polishing until mirror and tool were cool, down to room temperature. That took about 25 minutes, so polishing did not begin until about 8PM. "Did you check the pitch with your fingernail?" Gordon asked me. I had not. He was reminding me that the pitch should yield slightly to the pressure of my nail. His polish prescription was a narrow "W" stroke, "one inch all around" (overhang on each stroke of the "W"), with tool on top for 5 minutes. But I had trouble achieving what Gordon calls the "smooth as silk" feel to the polishing stroke, the tool moved with difficulty. So I cold-pressed for another 18 minutes before polishing.
![[Mar 7 mirror at 8PM]](lron1_030705.jpg) We tested the mirror at 8PM to see where we now were. The Rochigram on the right shows the continued "belly button" in the center, and the ripples in the Ronchi bars indicate the circular zoning. Gordon prescribed three sets of polish and press; a W-stroke with 1-1/2 inch overhang followed by cold press. Alternate sets of MOT-TOT-MOT (mirror or tool on top) with about ten pounds of force when polishing. He advised 5 minutes for polish or press, but as I still did not have good contact with the mirror AND my polishing technique is poor (as I'll discuss) I did 10 minutes for each polish and press. The contact between tool and mirror was better but not "smooth", as Gordon confirmed when he did a few polishing strokes himself. I noticed that he had a firmer grip and stronger stroke on the mirror than I could; I assumed he had bigger hands, but a simple comparison showed they are slightly smaller than mine.
We tested the mirror at 8PM to see where we now were. The Rochigram on the right shows the continued "belly button" in the center, and the ripples in the Ronchi bars indicate the circular zoning. Gordon prescribed three sets of polish and press; a W-stroke with 1-1/2 inch overhang followed by cold press. Alternate sets of MOT-TOT-MOT (mirror or tool on top) with about ten pounds of force when polishing. He advised 5 minutes for polish or press, but as I still did not have good contact with the mirror AND my polishing technique is poor (as I'll discuss) I did 10 minutes for each polish and press. The contact between tool and mirror was better but not "smooth", as Gordon confirmed when he did a few polishing strokes himself. I noticed that he had a firmer grip and stronger stroke on the mirror than I could; I assumed he had bigger hands, but a simple comparison showed they are slightly smaller than mine.
![[Mar 7 mirror at 10PM]](lfou2_030705.jpg) At 10PM we checked the mirror again. Gordon noted a slight turned down edge but was not concerned about it. He was more interested in the reduction of the zoning, and about how to remove the belly-button hill in the center. Gordon prescribed a 1-1/4" overhang stroke, a narrow W-stroke no more than an inch wide. Gordon tried to explain his choices for the length and width of the stroke, but at the late hour I was too tired to follow his description. For novice glass-pushers like myself, all the effort is to focus on the glass work; it's difficult to pay attention to the logic and choices of which strokes, what lengths.
At 10PM we checked the mirror again. Gordon noted a slight turned down edge but was not concerned about it. He was more interested in the reduction of the zoning, and about how to remove the belly-button hill in the center. Gordon prescribed a 1-1/4" overhang stroke, a narrow W-stroke no more than an inch wide. Gordon tried to explain his choices for the length and width of the stroke, but at the late hour I was too tired to follow his description. For novice glass-pushers like myself, all the effort is to focus on the glass work; it's difficult to pay attention to the logic and choices of which strokes, what lengths.
I did two sessions of ten minutes press and ten minutes polish, first with TOT and second MOT. The tool was making more complete contact with the mirror, so the stroke was becoming "smoother".
During my second (mirror on top) polish session, Gordon had more time to observe me closely and so he stopped me for comment about my polishing "form". He explained that in order to polish for long periods and put pressure on the stroke, I could not use my arm and shoulder muscles and stand still as I was doing. I had to rock back and forth on my FEET, and use my LEG muscles to move my body and the mirror, holding my arms and shoulders locked. Use of the larger muscles in my legs would increase my endurance. Gordon watched carefully as I tried to follow his directions. "Like tai chi" Gordon offered. Others in the shop added their comments about my form and movements; I made comments about their family members. After ten minutes of this I stopped but Gordon said "keep going." Another five minutes and I said "Do I stop now?" "Keep going." Gordon insisted that I perfect this stroke. So my last polish was for about 24 minutes. When Gordon stopped me, he said: "Now, that's where you did all your work tonight."
check and presecription
![[Mar 7 mirror at 12mid]](lfou3_030705.jpg)
![[Mar 7 mirror at 12mid]](lron3_030705.jpg) At 11:40 we did a final test and review. Sure enough, there was a major change in my mirror. The good news was that the "belly button" was gone and almost all the zoning was gone. However, my figure went to an oblate spheroid - note the slight hill over the inner 50% zone on the Foucaultgram. But a quick measurement of the inner and outer zones showed that the difference was still about 65 mills, which is consistent with prior measurements and within the "target" of 60 mills.
At 11:40 we did a final test and review. Sure enough, there was a major change in my mirror. The good news was that the "belly button" was gone and almost all the zoning was gone. However, my figure went to an oblate spheroid - note the slight hill over the inner 50% zone on the Foucaultgram. But a quick measurement of the inner and outer zones showed that the difference was still about 65 mills, which is consistent with prior measurements and within the "target" of 60 mills.
Gordon's prescription for next time was "mirror on top; 1-1/4" overhang top and bottom of stroke; 1" inch wide W-stroke for 5 minutes followed by 1-1/2" to 1-3/4" straight stroke for 3 minutes. Do two or three sessions, cold presses in between."
This prescription seemed like a lot of mirror-on-top work, in addition to my long MOT session. See the side notes about
hyperboloids for why all that was and is necessary. Briefly, my mirror was hyperbolic, too deep; now it is an oblate spheroid, which can be corrected back to a sphere and then parabolized.
April 4th 2005 and The Disappearing Microfacets
This is work in progress, so I'm just showing the images and comments for my April 4-5th work; details will follow.
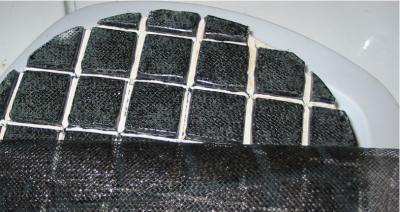
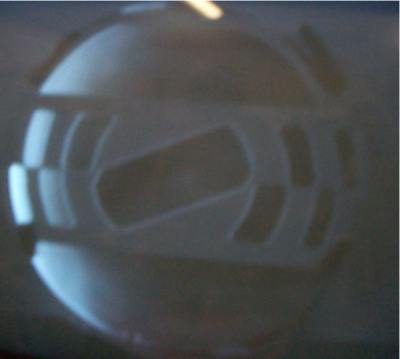
![[Apr 4 tool]](lfacet_2.jpg)
![[Apr 4 tool microfacets]](lfacet_1.jpg) Apr 4 8PM. The left image is the tool, under the mirror in polishing position on the table. The right image is a closeup showing the microfaceting of each square. Note the bubbles around the squares, a good sign of adequate polishing compound and water.
Apr 4 8PM. The left image is the tool, under the mirror in polishing position on the table. The right image is a closeup showing the microfaceting of each square. Note the bubbles around the squares, a good sign of adequate polishing compound and water.
![[Apr 4 mirror at time 1]](lfou_facet1.jpg)
![[Apr 4 mirror at time 1]](lron_facet1.jpg) Apr 4 9:30PM. After three rounds of polishing (mirror on top, 5 minutes W stroke, 3 min C-C stroke) and pressing, there
are two zones; the hill in the center is just above the edge zone; just beginning a turn down edge. Prescription: Need longer stroke, a tiny W stroke would not hurt. 8-10 min 1/3 C-C stroke, four times with pressing. Michael suggests "Let the mirror rotate with the tool on the turntable, every 6th or 7th stroke. This is not so importatnt when you are working toward a sphere. But when you are doing your final parabolizing, you could get screwed if you don't."
Apr 4 9:30PM. After three rounds of polishing (mirror on top, 5 minutes W stroke, 3 min C-C stroke) and pressing, there
are two zones; the hill in the center is just above the edge zone; just beginning a turn down edge. Prescription: Need longer stroke, a tiny W stroke would not hurt. 8-10 min 1/3 C-C stroke, four times with pressing. Michael suggests "Let the mirror rotate with the tool on the turntable, every 6th or 7th stroke. This is not so importatnt when you are working toward a sphere. But when you are doing your final parabolizing, you could get screwed if you don't."
![[Apr 4 mirror at time 2]](lfou_facet2.jpg)
![[Apr 4 mirror at time 2]](lron_facet2.jpg) Apr 4 11PM. Three rounds of 8-minute polishing done. Improved surface, more toward sphere: measures .070 center to edge (parabolid is .060), turned down edge almost gone. Prescription: Do three more rounds of polishing as previous.
Apr 4 11PM. Three rounds of 8-minute polishing done. Improved surface, more toward sphere: measures .070 center to edge (parabolid is .060), turned down edge almost gone. Prescription: Do three more rounds of polishing as previous.
![[Apr 4 mirror at time 3]](lfou_facet3.jpg)
![[Apr 4 mirror at time 3]](lron_facet3.jpg) 12:40 AM. Did four rounds of polishing, 10 minutes - total of ten polishing sessions. Result is "more oblate", measures .120 center-to-edge.
12:40 AM. Did four rounds of polishing, 10 minutes - total of ten polishing sessions. Result is "more oblate", measures .120 center-to-edge.
Bleah! What's the problem here? Gordon says when you are not making progress over a few polishing cycles, check your microfaceting. "Run your finger over the pitch facets. When they FEEL smooth - re-microfacet. You can't do this by eye. The cerium oxide embedds itself in the pitch around the microfacets: they look deep but they are not. Close your eyes, feel the pitch, and be honest." He explains that the work is done by the fresh CeO around the microfacets; the cerium embedded in the pitch on the facet surfaces gets worn down quickly. Gordon also discussed microfaceting and pitch with me earlier: check these notes about "zoning".
Prescription: microfacet again, continue 1/3 C-C with mirror on top, with brief 1-inch W stroke per session; monitor results.
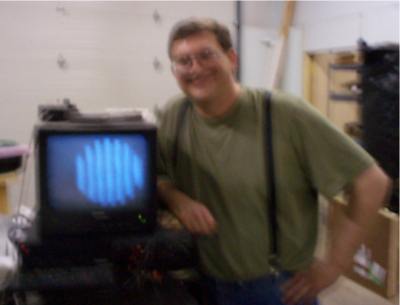
I have these notes seperately as a long narrative (blog), but here's the punch line. After I slogged
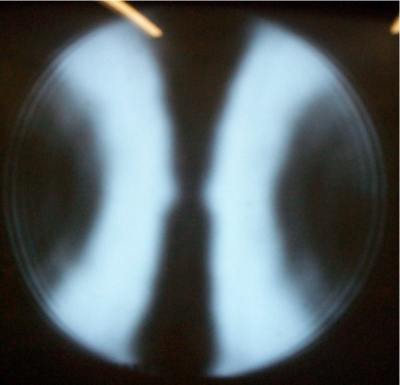
the mirror around all evening on the 18th, the evening ended with Gordon very happy in this slightly blurry image. Why? Check the monitor...
![[Apr 18 sphere]](lmid_fou.jpg)
![[Apr 18 sphere]](lmid_ron.jpg) The Ronchigram on the right tells the story: almost straight lines. After 17 minutes of Gordon's magic mirror moves, and you can see he achieved a sphere on my mirror! The Focaultgram on the right practically flat. A higher contrast Focaultgram shows a little hollowing at the 50% zone.
The test results confirm that: .160 .152 .153 .160 .161, overall delta about zero. The computer says from the numbers, it's an 1/11 wave sphere, even 1/2 wave paraboloid!
The Ronchigram on the right tells the story: almost straight lines. After 17 minutes of Gordon's magic mirror moves, and you can see he achieved a sphere on my mirror! The Focaultgram on the right practically flat. A higher contrast Focaultgram shows a little hollowing at the 50% zone.
The test results confirm that: .160 .152 .153 .160 .161, overall delta about zero. The computer says from the numbers, it's an 1/11 wave sphere, even 1/2 wave paraboloid!
May 2nd: To The Parabola
The bottom line in going from a sphere to
the correct parabola is in the numbers. Here's the numbers for the desired
parabola, for our 8-inch with 113 inch or so of radius of curvature:
desired DELTA results: .000 .017 .014 .014 .014, total delta about .060.
Remember, the Focault tester gives relative lengths of radius of curvature, it's the
DELTAS between those zones of radius that tells us whether the curve is a sphere,
a parabola (and the one we want), a hyperbola, or a oblate spheroid. Tonight we
start with a sphere, those "deltas" are a few to several mills from the April 18th sesson
ending with Gordon spher-izing my mirror.
8:22 PM: Microfacet, cold-press, and the Parabolizing W-stroke for my 8-inch mirror. That's
mirror on top, all strokes straight across the whole tool, with the end of each stroke with the
mirror center about 3/4" from the edge of the tool. One central stroke ("ONE"), two strokes to the right edge ("TWO" "THREE"), then back the same way to the center ("TWO" "ONE"), then the same to the left
("TWO" "ONE" "TWO" "THREE"); then turn the mirror every OTHER time it reaches the center (I think). Do these for 5 minutes or so, says Gordon. I'm sloppy but I get this done.
![[May 2 mirror at 9:16]](lh_ron916.jpg) 9:20 PM: here's the Ronchigram, and the
Focault-masked test results are: .307 .342 .366 .378 .392. Total delta .085,
9:20 PM: here's the Ronchigram, and the
Focault-masked test results are: .307 .342 .366 .378 .392. Total delta .085,
not much change
from the sphere there. But I have a 1/4.2-wave parabola! "With a slight turned up
edge, but that's OK." Do a cold press, then mirror on top, stroke 1" from center,
two-inch stroke, with a slight ellipical width of about 2mm wide. Three-four strokes,
then release and turn.
![[May 2 mirror at 10:10]](lh_ron1000.jpg) 10:10 PM: here's the Ronchigram, and the masked test results: .096 .130 .145 .168 .175. Total delta .079. Gordon, Michael et al review the consequences.
Now the mirror is 1/5.47 wave. The prescription is "do the same, but over 1-1/4" instead,
two minutes." Gordon monitors me and says I'm too close to center or too short on stroke. I polish for about 4 minutes as a result.
10:10 PM: here's the Ronchigram, and the masked test results: .096 .130 .145 .168 .175. Total delta .079. Gordon, Michael et al review the consequences.
Now the mirror is 1/5.47 wave. The prescription is "do the same, but over 1-1/4" instead,
two minutes." Gordon monitors me and says I'm too close to center or too short on stroke. I polish for about 4 minutes as a result.
10:25 PM: Test result: .172 .200 .226 .244 .253 Total delta .081 (about the same)
I'm now 1/4th wave, but my second zone from center is too deep. "Do four minutes".
But Gordon watches and after I finish adds "now do a 4/5ths center-over-center stroke for
one minute".
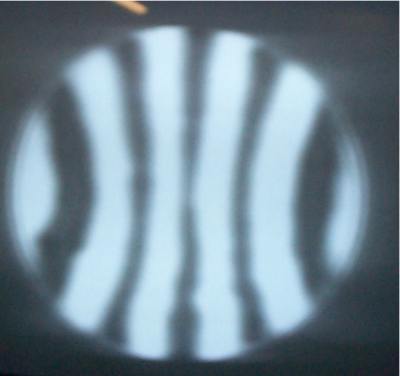
![[May 2 mirror at 11:30]](lh_ron1130.jpg) 11:35 PM: Test result: .098 .120 .143 .166 .178. Total delta .080, radius 112-7/8"
11:35 PM: Test result: .098 .120 .143 .166 .178. Total delta .080, radius 112-7/8"
The Ronchigram on the right doesn't show much change but,
the two inner zones have improved, the third zone needs to be a smaller delta.
Prescription: "a 3/4-inch to 1-1/4 inch offset stroke for four minutes, then
a 4/5ths long stroke center-over-center for one minute".
![[May 2 mirror at 1200]](lh_fou1200.jpg)
![[May 2 mirror at 1200]](lh_ron1200.jpg) 12:05 PM: Test result: .096 .112 .139 .163 .179. Total delta .083, 1/3.8th wave.
12:05 PM: Test result: .096 .112 .139 .163 .179. Total delta .083, 1/3.8th wave.
the masked Focaultgram is challenging to read.
The Ronchigram on the right doesn't show much change, but
the Focaultgram on the left looks less like a sphere and more like those
textbook pictures of a paraboloid. (I had to enhance this picture, the contrast was more subtle
compared to the other images.)
Center zone better, intermediate zones need work. "1/3 C.O.C stroke, with pressure
for three minutes, or light pressure four to five minutes." I opt for the four minutes.
12:27 PM: Gordon measures the mirror "hot", right off the table:
test result: .070 .072 .091 .111 .130 @ radius 112-7/8". Total delta is where we want it, .060.
The computer says it's 1/8.3th wave - when hot from polishing. We wait a few minutes.
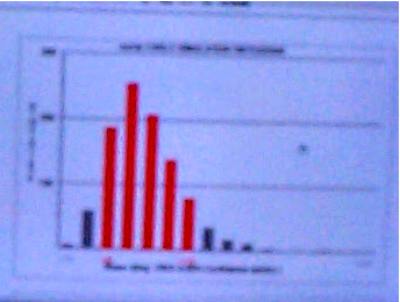
A cooler test result: .063 .073 .097 .117 .128. total delta .065, 1/6th wave! The
graph from the computer gives the probabilities of the
surface quality: 95% confidence of 1/6th wave, 50% confidence of 1/8th wave. (I'll have to ask
Gordon what this bar chart means.)
Michael says: "If you touch that mirror, other than to put it in a box to send it to be aluminized, we'll throw things at you." Gordon mentions he's going to make an aluminizing
"run" in a week or so. I ask for a price, and accept it.
We pose around the mirror for a photo, and the mirror waits in Gordon's shop.
![[completed scope]](ltube_6.jpg)
Eventually, you have to put the mirror in a telescope. I constructed a simple "optical tube assembly" or OTA from a Sonotube, a wooden mirror cell, the usual 4-vein secondary spider and holder, and a 1.25 inch rack focuser. All items were bought at star parties, fairly cheap. I used the common "newt" program to determine a reasonable secondary size - 3/4 inch - and where all the optical items needed to be mounted on the cardboard tube.
The mirror holder is a simple bit of plywood and board with the mirror held on mostly with rubber compound, but with some clamps for safety. The plywood is spring-mounted to a triangular holder screwed to the cardboard tube. Three wingnuts on the sprung bolts provide adjustment of the mirror in the usual fashion. At a later time I'll have photos of the mirror cell and OTA parts.
At summer 2005's star party at Cherry Springs PA at Black Forest State Park, I picked up a Meade equitorial telescope mount, with AC motor and shaft encoders; and with a few fixes by the previous owner. Even got a drive corrector, in a toolbox with a pair of batteries!
Then all was quiet, for about a year....
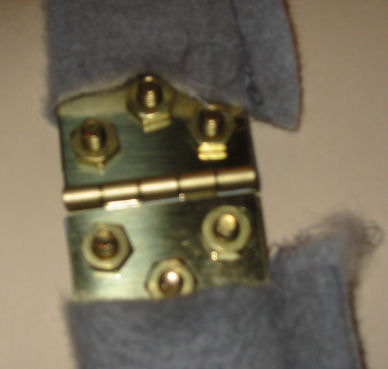
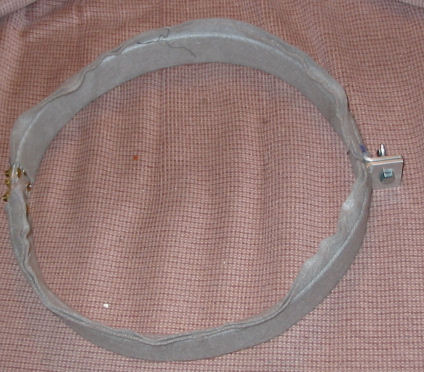
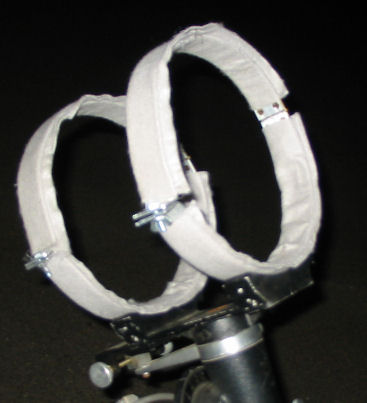
In early August 2006, while moving that mount around in my garage, it occurred to me to make rings appropriate to my 11 inch OTA for that Meade mount. I spent about $30 on aluminum strap (1.5" X 4 ft.), a pair of brass hinges and screws (the screws and nuts were about 40 cents a set!). A bit of felt sewn along the length as a kind of "sock" provided both clamping cushioning and a bit of bearing so I could rotate the OTA as needed. They are easily replaced, yet will stay in place during use. The other end of the rings from the hinges is a simply bolt and wingnut, which provides adjustment of friction. The rings mount on the mount by a pair of screws; in this photo you can see both the wingnut end on the "near" side, and the inside of the hinges on the "far" side of the rings.
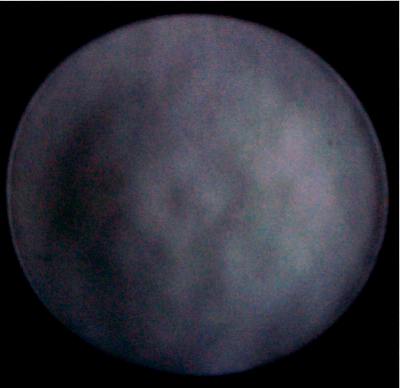
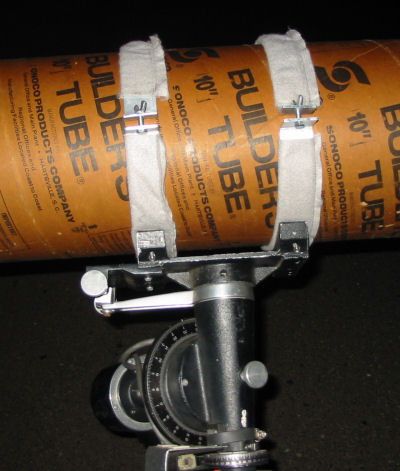
Here's the assembled telescope, first light on Aug 7th at Gordown Waite's ATM shop meeting, a hot and cloudy night. Here's a closer look at the rings in place on the tube. All I could look at was the almost full moon, with humidity and clouds providing a "neutral density" filter. A 26-inch Possell eyepiece provided about a 3/4 degree field of view, mostly filled by the moon. I did not power it up to test tracking.
In 2007, I used the telescope to observe an asteroid occultation - or so I hoped. But the 9th magnitude star did not "blink" during the time the event "should" have occurred, so all I could report was a negative. Nonetheless, the tracking of the mount was just fine for visual observing, and I could see from my urban backyard at midnight, down to 9th mag or a little better.
Side notes
![[Apr 4 tool w/bubble]](lpitch_bubble.jpg) What happens when you heat up a fresh tool with pitch squares? At the April 4 2005 ATM session,
STAR member Gavin Warnes brought in his
6-inch pitch tool for pressing. The procedure is to put the tool in a bath of warm water for a few minutes and
then QUICKLY press it upon the mirror. (details to be added). However, what if the water is TOO warm, and the pitch
maybe has some bubbles of turpentine - maybe from the fact the tool sat in a car on a sunny day that afternoon?
Turpentine is volitile and will start to emit vapor; the pitch gets pretty soft; vapor plus gooey pitch equals some
BUBBLES! Pretty impressive...Nonetheless, the lap was repaired and put to use. Despite the hole where
the bubble occurred, he used the lap to bring his mirror to a sphere that evening.
What happens when you heat up a fresh tool with pitch squares? At the April 4 2005 ATM session,
STAR member Gavin Warnes brought in his
6-inch pitch tool for pressing. The procedure is to put the tool in a bath of warm water for a few minutes and
then QUICKLY press it upon the mirror. (details to be added). However, what if the water is TOO warm, and the pitch
maybe has some bubbles of turpentine - maybe from the fact the tool sat in a car on a sunny day that afternoon?
Turpentine is volitile and will start to emit vapor; the pitch gets pretty soft; vapor plus gooey pitch equals some
BUBBLES! Pretty impressive...Nonetheless, the lap was repaired and put to use. Despite the hole where
the bubble occurred, he used the lap to bring his mirror to a sphere that evening.
On April 18th, Gavin returned to Gordon's to parabolize his now-spherical mirror. Later that evening,
he finished his first run - 20 minutes, on a stationary stand. He set up the mirror on the Focault tester, Gordon measuring Gavin's results. Unfortunately, the results were all too clear from the initial Ronchi test. It revealed a huge hole at
roughly the central 25% zone on the Ronchigram. The numbers from hell: .450 for the outer zone, versus .080 for the bottom of the hole. "Very pretty, like a spider", said Michael. Gavin got a lot of sympathy from Gordon and Michael, especially when Gordon said "Two hour's polishing" to bring down the rest of the mirror to the level of the hole. Gavin took the mirror home to follow the prescription there.
Gordon told me that, a week later, Gavin came back to show his
additional two hours of work on his mirror. Says Gordon, "He succeeded
pretty well. The mirror was basically back to spherical, except
with a little bit of zoning. The "spider" was gone, so a slight
bit more smoothing and he's back on the right road. See, there's
not much that you can polish in that can't be polished out. The
trick is "slow and steady" so no problem gets out of hand. Especially
when parabolizing, until you have experience you want short
sessions and lots of testing to stay in control."
On May 3rd, Gavin worked his "deep impact" mirror: Sorry for the lack of annotation, I'm rushed
to get this online at Gavin's request. He's been very generous in accepting all our
good-natured remarks about his tool and mirror results. But as Gordon says, you can work it all out
eventually, and his results show progress.
Here's his May 3rd 7:30PM Focaultgram and his 7:30PM Ronchigram. There are zones but it's mostly spherical.
Here's his 10PM Ronchigram, and his 11PM Ronchigram,
as he works out the zones but has some edge issues.
At the end of my March 7th 2005 session, my mirror was dramatically different from days and months previous. But it got there in part because of a long session of polishing with the mirror on top; and Gordon prescribed even MORE "MOT" work. I was not sure about all this work with the mirror on top. Isn't that a lot of one-sided polishing? But as Gordon explained later, "Your mirror is starting to go oblate. That means that you have a central HILL, not a central hole. To get rid of any hill, you have to polish [with] mirror on top. Thus my recommendation for all that mirror-on-top work."
Gordon continued: "The tricky part is this. The previous strategy was put in effect because your mirror was way too deep. (It was hyperbolic.)" Gordon told me this earlier, based on the zonal measurements he made in Feb 2005.
"To fix this," says Gordon, "you did what we did. What we did doesn't take a mirror smoothly back to paraboloidal. Instead, it takes a mirror to an oblate spheroid. (Which is where the center of the mirror is a hill, and the edge is turned up.) After you get to the oblate spheroid, you correct THAT back through a sphere and then re-parabolize. So it's not exactly like a smooth progression of figures. It's like 'you can't get there from here.' So you take it someplace else where you CAN 'get there from here!'"
Gordon is of course correct, in fact CLASSICALLY correct. The night before I got Gordon's advice, I reread a classic book on mirror making, Making Your Own Telescope by Allyn J Thompson and recommended by Gordon. It's classic because it was first printed in 1947, from even earlier articles in Sky and Tel by the author; it's still in press today. Thompson explains in "correcting the Hyperboloid" how my previously too-deep or hyperbolic mirror needed correction but became a oblate spheroid:
"The hyperboloid is usually the result of overshooting the paraboloid, or too zealous work in correcting the oblate spheroid. In it, the radius of curvature of the center zone is shorter that that of the edge zone. This is likewise true, of course, of the ellipsoid and the paraboloid, but with the hyperboloid the distances between the [zones]..is greatest. On the Foucault stand, the shadow boundaries on all three figures will be alike, but the shadow DEPTHS will differ....[the treatment is as follows:] The glass edge must be planed down to the level of the depth of the center, and this is done with a short stroke. With this stroke, however, the distribution of the polishing cannot be so controlled as to return the figure to a sphere. Instead, an oblate spheroid is usually the outcome, and that figure can in turn be dealt with as [previously] described."
Incidently, Thompson's book also describes the proper stance for polishing; his comments and photograph are much as Gordon described to me earlier.
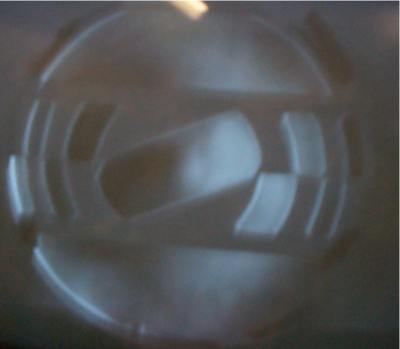
![[2004-05 pitch lap]](lmirlap2.jpg) Gordon Waite and I discussed my zoning problems during Feb 2005, at STAR's Web site ATM discussion board on March 2005. The worst of the zoning is shown on the Foucaultgram on the right; the tool and its pitch pattern is shown on the left. The 8-inch tool has about 7.25 squares across in each direction. (The discussion below is copied with Gordon's permission.)
Gordon Waite and I discussed my zoning problems during Feb 2005, at STAR's Web site ATM discussion board on March 2005. The worst of the zoning is shown on the Foucaultgram on the right; the tool and its pitch pattern is shown on the left. The 8-inch tool has about 7.25 squares across in each direction. (The discussion below is copied with Gordon's permission.)
Herb: I think [my zonal rings] may be due to, among other things, a pitch lap that needed more press time, and possibly some consequence of the location of the pitch squares (sez Gordon). These zonal rings have persisted throughout my polishing through the months. Gordon, it occurs to me that I might try polishing on a NONrotating table, just walk around it and rotate the mirror (on the bottom) in the traditional way. That would reduce the consistent ROTARY polishing action and most of my polishing would be RADIAL, and so take down those rings. Any thoughts? - Herb
Gordon: The turntable action doesn't put in the zones. It's the length of the stroke, lack of variation in stroke, and patterning from the lap. [Possibly you also have] a too hard lap without enough microfaceting. If you're too deep overall (an overcorrected paraboloid) then you'll have to work some with the mirror on the bottom to reduce the amount of correction. And lengthen out your stroke a little bit, something close to 1/3 CoC (center over center). When you go TOT (tool on top), work maybe 5 minutes and press for 5 or 10 minutes. You don't want to have the mirror and lap get out of touch. It should be silky smooth. If it's not, you're putting in zones. When it stops being silky smooth, press the lap; if it doesn't get better with cold pressing, microfacet and try again. If it still doesn't feel silky smooth, you probably have a too-hard lap. Especially if your polishing room is on the cold side. Good luck with it! - Gordon
Herb: It's interesting that these rings or zones have been a persistant problem with my tool and mirror: you can see them in most of my Foucaultgrams. Do you think that the particular facet spacing and size is the issue? While [the pattern] is offset [from the center], perhaps it still has some kind of circular symmetry (you call it patterning) which produced the zoning - therefore your instruction of a longer stroke?
Gordon: A lot of times the size of your pitch facets come close to matching the length of your stroke, or your stroke may be a multiple of the facet size. 1" facets are pretty common, as is a stroke with 1" overhang front and back. When this happens, the channels tend to end up in the same place stroke after stroke, and that makes a zone. You can get rid of it by taking longer strokes or shorter strokes, although shorter strokes are more prone to the patterning effect. Or sometimes it helps to offset your stroke from center by 3/4" or so, and that might help as well. Or a "W" stroke for a session will often smooth out patterning. Or sometimes flipping it over so the mirror is on the bottom. Any of these may help.
In pro shops they often have multiple laps, with a different facet size on each lap. Then you change laps for alternate sessions and that helps as well. If it's really a problem, it also helps to make a new lap with a larger facet. You can make facets anywhere from 3/4" to 2". I often make a 1.25" facet with a .25" channel for a 1.5" total pattern. That is fair for smoothing effects. On larger laps you can have bigger facets.
If you are working by hand and your facet pattern is symmetrical, that can also lead to patterning and zoning. If that's the problem, you just have to make a new and improved lap. - Gordon
Herb: My 8-inch lap has just over 7.25 squares in each dimension, so square plus channel is just over one inch. My central square is offset from the lap center by about 1/8 inch. I'll make sure a photo of my lap is on my Web site. I'll try to photograph the lap in rotation to see if an obvious circular pattern emerges. Gordon, perhaps you can think of other techniques I can use short of remaking the whole lap; seeing as I'm pretty close to my desired curve and a reasonable surface. But it may be your judgement that it is EXACTLY those circumstances where a new pitch lap is called for.
Gordon: Your mirror is still a little too deep, so you could try a session with TOT (tool on top), and go with a "W" stroke, with about a 1" overhang everywhere. This will reduce the hyperboloid a little, and will tend to smooth out the zones. Make sure you do a good press before, and (if you do a warm press) make sure all the heat has left the mirror and lap before starting. Work in short sessions, like 5 minutes of work, then a 5 minute cold press. You need to keep very good contact or you'll get a TDE. - Gordon
Herb: Your advice makes sense to me. The W stroke would I presume break up the zoning tendency. My last sessions of polishing have been a COC stroke. I'll do a very warm initial press, and wait for everything to cool down, under your direction [next session]. Then I'll start my polish session if all feels "silky smooth", otherwise I'll heat up and re-press. After one polish session we can test and see what progress has been made.
Zoning not unusual...
By the way, I found another example of a mirror with zoning. Courtesy of a Marc 2005
post on starastronomy.org's ATM discussion
group, the following is a link to an image of a slightly larger mirror with a small bit of zoning. Namely, the 8.4 meter mirror worked on by Steward Observatory Mirror Lab in AZ. Here's an interferogram of the mirror. which shows both the thermal effects of a person's body on the glass, and what I assume are zonal rings. If I read the chart correctly, those rings are about +/- 20nm, which at green-light (510nm) frequencies represents about 1/12th wave overall variation. The site refers to a 15nm goal, so they are "close" to that.
Herb Johnson
Measurement of the curve of the mirror is done by "masking off" the mirror under Foucault test, to only reveal various diameters or "zones" from center to edge. The Foucault tester is then adjusted so the knife edge is at the center of focus for each zone, to produce a relative measurement. "Relative" means that the tester's "zero" is set somewhere outside the range of focus and so each zone's numeric value is for focus from that zero. The DIFFERENCES or "deltas" between those zones are the values of importance, as they can measure the overall parabolic curve. .
![[masked mirror]](lmask1.jpg) Zonal masked Foucaultgrams of the Jan 17th measurements show the typical visual appearance of the outermost and the innermost zones when the measurements were taken. A number of software programs are available which accept these values and compute the best fit parabola (or sphere) which would produce these same measurements. Conversely, when you figure the mirror, you can use the "best" values as calculated, and simply compare them to your measurements-in-progress to see if you are close to the desired curve
Zonal masked Foucaultgrams of the Jan 17th measurements show the typical visual appearance of the outermost and the innermost zones when the measurements were taken. A number of software programs are available which accept these values and compute the best fit parabola (or sphere) which would produce these same measurements. Conversely, when you figure the mirror, you can use the "best" values as calculated, and simply compare them to your measurements-in-progress to see if you are close to the desired curve
Gordon's zonal measurements for several sessions are below, and a set of differences for a "perfect" parabolic curve.
		Jan 17		Jan 31		Mar		April		May 2005	target DELTAS
		11:30PM		midnite		11:40PM		sphere		parabola	113" 8-inch mirror
cntr:		.311		.402		n/a		.160		.063		.000
zone:		.351		.416		n/a		.152		.073		.017
zone:		.386		.438		n/a		.153		.097		.014
zone:		.418		.452		n/a		.160		.117		.014
outr:		.448		.480		n/a		.161		.128		.014
		-----		-----		-----		-----		-----		-----
diff:		.137		.078		.065		.low		.065		.060
A copy of one "Tex" program's output for the May 2005 test is as follows:
TEXEREAU MIRROR TEST SHEET

           Comments: (null)   Optical diameter: 8
  Readings per zone: 1
Radius of curvature: 112.875
                f/D:  7.05
   Diffraction disc: 0.000185905

 1 ZONE                1          2          3          4          5
 2 h(x)              1.7900     2.5300     3.1000     3.5800     4.0000
 3 h(m)              0.8950     2.1600     2.8150     3.3400     3.7900
 4 hm**2/R           0.0071     0.0413     0.0702     0.0988     0.1273
 5 hm/4f             0.0040     0.0096     0.0125     0.0148     0.0168
 6 D1                0.1260     0.1460     0.1940     0.2340     0.2560
 7 D2                0.1260     0.1460     0.1940     0.2340     0.2560
 8 D12               0.1260     0.1460     0.1940     0.2340     0.2560
 9 D12 -  0.1232     0.0028     0.0228     0.0708     0.1108     0.1328
10 Lamda c          -0.0043    -0.0185     0.0006     0.0120     0.0056
11 Lamda f * 1e5      -1.70     -17.72       0.76      17.72       9.33
12 Lamda f / rho     -0.091     -0.953      0.041      0.953      0.502
13 u * 1E6             0.30       3.14      -0.13      -3.14      -1.65
14 Wavefront           0.42       2.63       2.43       0.81       0.00
	Reference parabola: y = 0.0365487 * x**2 + 0
	passing through (  0.00,  0.00) and (  4.00,  0.00)

Maximum wavefront error = 1 / 8.2 wave at zone 2
Herb Johnson
Contact information:
Herb Johnson
New Jersey, USA
To email @ me, look at my commercial Web page for address
Copyright © 2005 Herb Johnson
![[8-inch mirror]](mymirror.jpg) History: Sometime in the late 1990's, I bought an unfinished Pyrex 8-inch mirror and its glass tool at NEAF. A few years later, Dave Sopchak offered his help and time to a stranger (me). I did a final polish and figure, producing what Dave called at the time "about a 1/3 wave" surface. Here's what the old polishing tool looked like (some years later.:(..) with its previous pitch lap, left
uncovered and essentially all dried out. Bleah!
History: Sometime in the late 1990's, I bought an unfinished Pyrex 8-inch mirror and its glass tool at NEAF. A few years later, Dave Sopchak offered his help and time to a stranger (me). I did a final polish and figure, producing what Dave called at the time "about a 1/3 wave" surface. Here's what the old polishing tool looked like (some years later.:(..) with its previous pitch lap, left
uncovered and essentially all dried out. Bleah!
![[Dec 2003 mirror]](focault1.jpg)
![[oct 04 mirror]](mf_oct04.jpg)
![[jan 05 mirror]](foc_105.jpg)
![[early jan 17 mirror]](focau1.jpg)
![[late jan 17 mirror]](focau2.jpg)
![[jan 31 mirror at 10]](focau3_1.jpg)
![[jan 31 mirror at midnite]](focau3_2.jpg)
![[jan 31 mirror at 1AM]](focau3_3.jpg)
![[Mar 7 mirror at 8PM]](ron1_030705.jpg)
![[Mar 7 mirror at 10PM]](fou2_030705.jpg)
![[Mar 7 mirror at 12mid]](fou3_030705.jpg)
![[Mar 7 mirror at 12mid]](ron3_030705.jpg)
![[Apr 4 tool]](facet_2.jpg)
![[Apr 4 tool microfacets]](facet_1.jpg)
![[Apr 4 mirror at time 1]](fou_facet1.jpg)
![[Apr 4 mirror at time 1]](ron_facet1.jpg)
![[Apr 4 mirror at time 2]](fou_facet2.jpg)
![[Apr 4 mirror at time 2]](ron_facet2.jpg)
![[Apr 4 mirror at time 3]](fou_facet3.jpg)
![[Apr 4 mirror at time 3]](ron_facet3.jpg)
![[Apr 18 sphere]](mid_fou.jpg)
![[Apr 18 sphere]](mid_ron.jpg)
![[May 2 mirror at 9:16]](h_ron916.jpg)
![[May 2 mirror at 10:10]](h_ron1000.jpg)
![[May 2 mirror at 11:30]](h_ron1130.jpg)
![[May 2 mirror at 1200]](h_fou1200.jpg)
![[May 2 mirror at 1200]](h_ron1200.jpg)
![[completed scope]](tube_6.jpg)
![[Apr 4 tool w/bubble]](pitch_bubble.jpg)
![[2004-05 pitch lap]](mirlap2.jpg)
![[masked mirror]](mask1_1.jpg)